|
Dla tego produktu nie napisano jeszcze recenzji!
 ;
Dobrej jakości skan - wkońcu mogłem poznać wszystkie funkcje tego odtwarzacza - polecam .
 ;
Gruba instrukcja - poprostu wszystko co potrzreba - polecam .
Select an S-meter level. Point the arrow at ON using the UP/DOWN key. Select a level from 1 through 7 TF using the dial, and then press the ENT key. If you do not want to select any STF meter level, select OFF and then press the ENT key (the initial setting is OFF). Higher levels require stronger signals to stop scanning. The display will return to the SCAN mode. Point the arrow at END and then TF press the ENT key (Alternatively, you may press the F key, and then press TF the ENT key with shown on the display).
DOWN UP
3
Note:
If you exit the SCAN menu by pressing the canceled.
SKIP CLR
key, the changed setting is
3.1.17 Setting the scanning pause period
The scanning pause period for the TIMER option can be set.
1
F
MON I SRCH LAMP
Call up the SCAN menu. Press the F key, and then press SET the HELP key with shown on SCAN the display. SCAN MODE BUS Y T i me r The SCAN menu will appear. Point the arrow at +CONFIG using the dial or UP/DOWN
OWER P
PMS
SET
VFO AB
MR MW
SQL VOL
SET ATT MODE
1
HELP
STEP
2
3
M NAME
RF C
KL
MW
key, and then press the ENT key. The CONFIG menu will appear. Point the arrow at TF +SCAN SETUP and then press the ENT key.
TF
MIC
AUTO
A-B
S
2 3
Call up the BUSY TIMER screen. Point the arrow at +Busy Timer and then press the TF ENT key.
B u s y T i me r 5s
Set the scanning pause period. Set the scanning pause period using the dial or UP/DOWN key, and then press TF the ENT key (the initial setting is 5s). The display will return to the SCAN menu. Point the arrow at END and then TF press the ENT key (Alternatively, you may press the F key, and then press the shown on the display).
Note: If you exit the SCAN menu by pressing the canceled.
SKIP CLR
key, the changed setting is
44
 $4.99 DJ-X2000 ALINCO
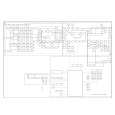
Schematy Zestaw schematów dla tego urządzenia. Plik PDF zawierający schematy będzie dostarczony na Twó…
|
