|
Dla tego produktu nie napisano jeszcze recenzji!
 ;
Dokładna dokumentacja, pomogła w szybkiej naprawie telewizora. Dziękuję!
 ;
jedyne do czego mogę mieć zastrzeżenie to jakość zdjęć zawartych w przesłanej instrukcji serwisowej ponieważ są fatalnej jakości, praktycznie nieczytelne. tak poza tym jestem zadowolony to jest to czego szukałem.
;
Wszystko w porządku.
Instrukcja czytelna i kompletna.
Dziękuję.
all right!
thank you.
;
Bardzo dobra instrukcja. Zawiera wszystko co potrzeba, polecam!
;
Instrukcja jest OK. Schematy czytelne, opisane niektóre procedury.
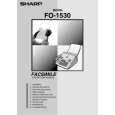
FO-1530A/HK
2 Remove the imaging film from the printing compartment and set it on
a sheet of paper.
5Wind the film slightly (rotate the gear on the right side of the rear
spool) so that there is no slack in the film. Make sure that both edges of the film wind onto the spool evenly.
3Gently pull the jammed paper out of the printing compartment.
6Close the print compartment cover, making sure it clicks into place.
�
Caution! Close the cover slowly to make sure it doesn�t pinch your fingers.
4Replace the imaging film, making sure that the flange goes into the
rear slot on the left side of the printing compartment. Also, make sure that the right, rear gear engages with the gear below it.
1�8
|