|
|
|
Kategorie
|
|
Informacje
|
|
Polecamy
|
|
|
 |
|
|
Dla tego produktu nie napisano jeszcze recenzji!
 ;
...instruction is ok.
...instrukcja jest ok.
Thanks/Dzięki
;
Documentation made available quickly and It is good quality. Thanks.
SECTION 1 GENERAL
Getting Started
The operating instructions mentioned here are partial abstracts from the Operating Instruction Manual. The page numbers of the Operating Instruction Manual remein as in the manual.
Step 1: Preparation
Check the supplied accessories
When you have taken everything out of the carton, check that you have these items: � Remote control � Two R6 (size AA) batteries � Stabilizer band � Two clamps � Two wood screws � AC plug adaptor � These operating instructions
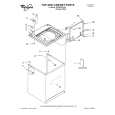
Step 2: Securing the video TV
(not used for this model)
Getting Started
To prevent the video TV from falling, secure it using one of the following methods:
A With the supplied screws, attach the stabilizer band to the TV stand and to
the rear of the video TV using the existing hole.
Insert the batteries into the remote control
video TV and a wall or pillar.
or
B Pass a cord or chain through the clamps and secure them to the rear of the
8 �
Note � Do not use old batteries or different types of batteries together.
20 mm 3.8 mm
A
B
or
4
Getting Started
Getting Started
5
|
|
|
> |
|