|
|
|
Kategorie
|
|
Informacje
|
|
Polecamy
|
|
|
 |
|
|
Dla tego produktu nie napisano jeszcze recenzji!
 ;
Wszystko w porządku.
Instrukcja czytelna i kompletna.
Dziękuję.
all right!
thank you.
;
Bardzo dobra instrukcja. Zawiera wszystko co potrzeba, polecam!
 ;
Instrukcja jest OK. Schematy czytelne, opisane niektóre procedury.
;
Instrukcja bardzo czytelna. zawiera co potrzeba. Polecam
;
...instrukcja serwisowa w pełni czytelna i kompletna. Dziękuję!
ADJUSTMENT OF TAPE TRANSPORTING SYSTEM
2) Pre-Adjustment of the Path (Adjustment of PG)
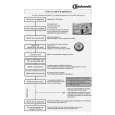
A. C onnect the Channel 1(CH 1) of the O scilloscope to TP01-3(Head Switching Pulse) and CH2 to the V IDEO OU T. And align the Tracking VR on the center. B. Playback the Stair-step Signal Tape(DN 2). C. Turn the PG Volum e and adjust the gap between the S witching signal and the V-S ync signal to be 6.5H0.5H .
Figure 5-5
3) linearity Adjustment
Connect the Channel 1(CH1) of the O scilloscope to the TP01-2(CTL Pulse) and CH2 to the TP01-4(Envelope Wave) and EXT. Trigger to the TP01-3(Switching P ulse). And then, playback the test tape in the SP M ode. 3-1) Adjustm ent of S & T side A. Adjust the Tracking VR to m axim ize the RF signal of the test tape. B. Make the entrance and exit side Envelope Wave same as Fig. 5-6 by adjusting the S/T-Guide Roller ( and of Fig. 5-1). 3-2) Rough Adjustm ent of the X-Position A. Turn the Tracking V R to align it on the center. B. Loosen the A /C Head Screws by turning about 90120.
Figure 5-6
Figure 5-7
30
|
|
|
> |
|