|
|
|
Kategorie
|
|
Informacje
|
|
Polecamy
|
|
|
 |
|
|
Dla tego produktu nie napisano jeszcze recenzji!
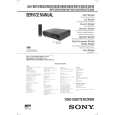
Step 2 : Setting up the remote commander (continued)
Code numbers of controllable TVs If more than one code number is listed, try entering them one at a time until you find the one that works with your TV. To make wide mode settings, see the footnotes below this table for the applicable code numbers.
Manufacturer Sony Akai Ferguson Grundig Hitachi JVC Loewe Mivar NEC Nokia Code number 01*1, 02 68 52 10*1, 11*1 24 33 45 09, 70 66 15, 16, 69*3 Manufacturer Panasonic Philips Saba Samsung Sanyo Sharp Telefunken Thomson Toshiba Code number 17*1, 49 06*1, 07*1, 08*1 12, 13 22, 23 25 29 36 43*2 38
Step 3
Connecting the VCR
If your TV has a EURO-AV connector, see page 10.
If your TV does not have a EURO-AV (Scart) connector
Getting Started
AERIAL IN
Mains lead to mains
AERIAL OUT AERIAL IN Aerial cable (supplied)
*1 Press WIDE to switch the wide picture mode on or off. *2 Press WIDE, then press � +/� to select the wide picture mode you want. *3 Press WIDE. The menu appears on the TV screen. Then, press >/./?// to select the wide picture you want and press OK. Notes � If the TV uses a different remote control system from the one programmed to work with the VCR, you cannot control your TV with the remote commander. � If you enter a new code number, the code number previously entered will be erased. � When you replace the batteries of the remote commander, the code number may change. Set the appropriate code number every time you replace the batteries.
: Signal flow
1
Disconnect the aerial cable from your TV and connect it to AERIAL IN on the rear panel of the VCR.
IN ENTREE
AERIAL OUT ANTENNE SORTIE
2
Connect AERIAL OUT of the VCR and IN ENTREE the aerial input of your TV using the supplied aerial cable. AERIAL OUT ANTENNE SORTIE
3
Connect the mains lead to the mains. If the mains plug does not fit in the mains, use the supplied plug adaptor.
Note � When you connect the VCR and your TV only with an aerial cable, you have to set RF MODULATOR in the OPTIONS-2 menu to ON (initial setting) (see page 63). continued
8
Getting Started
Getting Started
9
Step 3 : Connecting the VCR (continued)
3
If your TV has a EURO-AV (Scart) connector
Connect LINE-1 (TV) on the VCR and the EURO-AV (Scart) connector on the TV with the optional EURO-AV cable. This connection improves picture and sound quality. Whenever you want to watch the VCR picture, press � TV/ VIDEO to display the VIDEO indicator in the display window.
AERIAL IN
Getting Started
Mains lead
: LINE-1 (TV)
AERIAL OUT
4
AERIAL IN Aerial cable (supplied) EURO-AV (Scart)
to mains
Connect the mains lead to the mains. If the mains plug does not fit in the mains, use the supplied plug adaptor.
Note � If the TV is connected to the LINE-1 (TV) connector, setting the RF MODULATOR in the OPTIONS-2 menu to OFF is recommended. In the OFF position, only the signal from the aerial is output through the AERIAL OUT connector (see page 63). You do not have to tune your TV to the VCR. Skip �Tuning your TV to the VCR� on page 14.
: Signal flow EURO-AV cable (not supplied)
1
Disconnect the aerial cable from your TV and connect it to AERIAL IN on the rear panel of the VCR.
IN ENTREE
About the SMARTLINK features
If the connected TV complies with SMARTLINK, MEGALOGIC*1, EASYLINK*2, Q-Link*3, or EURO VIEW LINK*4, you can use
SMARTLINK
AERIAL OUT ANTENNE SORTIE
2
IN Connect AERIAL OUT of the VCR and ENTREE the aerial input of your TV using the supplied aerial cable. AERIAL OUT ANTENNE SORTIE
the SMARTLINK function after you complete the steps on the previous page (the SMARTLINK indicator appears in the VCR�s display window when you turn on the TV). You can enjoy the following SMARTLINK features. � Preset Download You can download your TV tuner preset data to this VCR and tune the VCR according to that data in Auto Set Up. This greatly simplifies the Auto Set Up procedure. Be careful, not to disconnect the cables or exit the Auto Set Up function during the procedure. See �Setting up the VCR with the Auto Set Up function� on page 13.
continued
10 Getting Started
Getting Started
11
1-2
|
|
|
> |
|