|
|
|
Kategorie
|
|
Informacje
|
|
Polecamy
|
|
|
 |
|
|
Dla tego produktu nie napisano jeszcze recenzji!
 ;
Schematy są ale można wysilić się i zrobić kolorowy skan i o większej rozdzielczości. Wtedy schematy płytek będą czytelniejsze. Całość super jako wartość merytoryczna. Wszystkie dane potrzebne do podłączenia różnego rodzajów urządzeń takich gramofon, CD itd.
 ;
Szybko, sprawnie i tanio. Serwis godny polecenia. Będę polecał innym
;
Ogólnie jest OK, z wyjątkiem obrazu płyty głównej, który jest miejscami mało czytelny, ale można sobie poradzić.
;
Dokładna dokumentacja, pomogła w szybkiej naprawie telewizora. Dziękuję!
;
jedyne do czego mogę mieć zastrzeżenie to jakość zdjęć zawartych w przesłanej instrukcji serwisowej ponieważ są fatalnej jakości, praktycznie nieczytelne. tak poza tym jestem zadowolony to jest to czego szukałem.
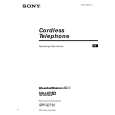
SPP-S2730 SECTION 5 ELECTRICAL ADJUSTMENTS
0 dBm = 0.775 V BASE UNIT
� Make the set in the test mode. (See page 13) 1. Power Failure Test Procedure: 1. Connect between TP338 and TP306 (GND) on the BASE MAIN board by lead wire. 2. In the test mode idling status, press the [1] key to display �TEST A�. 3. Check that the [NEW CALL] LED on the base unit lights up when connect between TP203 and TP306 (GND) on the BASE MAIN board. 2. Ring Detection Test Procedure: 1. In the �TEST A� status, connect the base unit to telephone line. 2. Check that the LCD back light on the base unit lights up when call the base unit. 3. Line Closing of Parallel Connected Another Telephone Detection (On Hook) Test Procedure: 1. In the �TEST A� status, connect the base unit to telephone line. 2. Connect this set and another telephone in parallel to one telephone line. 3. Check that the [NEW CALL] LED on the base unit lights up when take up the receiver of another telephone. 4. Automatically Hold Canceling Test Procedure: 1. In the test mode idling status, press the [4] key to display �TEST D�. 2. Connect the base unit and another telephone in parallel to one telephone line. 3. Take up the local handset of base unit, and press the [HOLD] key to hold. 4. Check that the [NEW CALL] LED on the base unit lights up when take up the local handset of another telephone. 5. C-ID Input Level Measurement Setting:
feeding bridge Line Line Trunk Base unit TP101 TP102 Trunk
5.
Between Microphone and Line Signal Level Measurement Setting:
feeding bridge Line Line Base unit TP101 TP102
600 � Input Output GND audio analyzer 1.2 kHz, �27 dBm LPF: 30 kHz ON 10 µF + TP475 TP306 (GND)
Procedure: 1. Connect equipments as the figure above. 2. In the test mode idling status, press the [6] key to display �TEST F�, and press the [5] key to set the speaker path test 2 mode. 3. Set the output level of audio analyzer to �27 dBm (1.2 kHz, LPF=30 kHz ON). 4. Check that the value of audio analyzer is �2 to �8 dBm. 5. Press the [VOL --] key to return the test mode idling status. Press the [6] key to display �TEST F� again, and press the [4] key to set the speaker path test 1 mode. 6. Change the output level of audio analyzer to �36 dBm. 7. Check that the value of audio analyzer is �2 to �8 dBm. Between Line and Speaker Signal Level Measurement Setting:
feeding bridge Line Line Trunk Base unit TP101 TP102
7.
Output Input
100 µF TP476 16 �
GND audio analyzer 1.2 kHz, �27 dBm LPF: 30 kHz ON 100 µF
TP477 (SP GND)
Output Input GND audio analyzer 1.2 kHz, �17 dBm LPF: 30 kHz ON TP413 TP306 (GND)
Procedure: 1. Connect equipments as the figure above. 2. In the test mode idling status, press the [6] key to display [4] key to set the speaker path test 1 �TEST F�, and press the mode. 3. Set the output level of audio analyzer to �27 dBm (1.2 kHz, LPF=30 kHz ON). 4. Check that the value of audio analyzer is �2 to �8 dBm.
Procedure: 1. Connect equipments as the figure above. 2. In the test mode idling status, press the [6] key to display �TEST F�. 3. Set the output level of audio analyzer to �17 dBm (1.2 kHz, LPF=30 kHz ON). 4. Check that the value of audio analyzer is �15 to �21 dBm.
20
|
|
|
> |
|