|
Dla tego produktu nie napisano jeszcze recenzji!
 ;
Dokładna dokumentacja, pomogła w szybkiej naprawie telewizora. Dziękuję!
 ;
jedyne do czego mogę mieć zastrzeżenie to jakość zdjęć zawartych w przesłanej instrukcji serwisowej ponieważ są fatalnej jakości, praktycznie nieczytelne. tak poza tym jestem zadowolony to jest to czego szukałem.
;
Wszystko w porządku.
Instrukcja czytelna i kompletna.
Dziękuję.
all right!
thank you.
;
Bardzo dobra instrukcja. Zawiera wszystko co potrzeba, polecam!
;
Instrukcja jest OK. Schematy czytelne, opisane niektóre procedury.
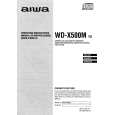
CAUTIONS WHEN SERVICING
1. Disassembly Procedure 1) Remove the COVER BOTTOM. 2) Remove the screws (pointed by the arrows), and then remove the DECK MECHANISM. See Fig. 1.
Fig-1
3) Remove the COVER TOP. 4) Remove the screws (pointed by the arrows), and then remove the CD MECHANISM. See Fig. 2.
2. Service Position Check the operation in the stable status (using a plate, etc.). See Fig. 3.
Fig-2
Fig-3
3. Test Mode 1. Starting CD Test 1) Use solder to short-circuit the TEST lands. See Fig. 4. 2) Connect the ACC/BACKUP wire of connector assembly to the positive (+) terminal of power supply unit, and the ground wire, to the negative (-) terminal. 3) Adjust the voltage of power supply unit to 14.5 V, and then turn the power on. The test mode will start, and all LCD segments will light. See Fig. 5.
IC401
SOLDER BRIDGE
IC901
Fig-4
2. Releasing CD Test Mode 1) Turn the power supply unit off. 2) Disconnect each wire of connector assembly. 3) Remove the solder from the TEST lands on the Main C.B.
Fig-5
-4-
|