|
|
|
Kategorie
|
|
Informacje
|
|
Polecamy
|
|
|
 |
|
|
Dla tego produktu nie napisano jeszcze recenzji!
 ;
...instruction is ok.
...instrukcja jest ok.
Thanks/Dzięki
;
Documentation made available quickly and It is good quality. Thanks.
ELECTRICAL ADJUSTMENTS
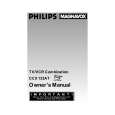
2-6: HORIZONTAL SIZE 1. Receive the monoscope pattern. 2. Using the remote control, set the brightness and contrast to normal position. 3. Activate the adjustment mode display of Fig. 1-1 and press the channel button (06) on the remote control to select �H. SIZE�. 4. Press the VOL. UP/DOWN button on the remote control until the SHIFT quantity of the OVER SCAN on right and left becomes 11%. 2-7: VERTICAL POSITION 1. Receive the monoscope pattern. 2. Using the remote control, set the brightness and contrast to normal position. 3. Adjust the VR401 until the horizontal line becomes fit to the notch of the shadow mask. 2-8: VERTICAL SIZE 1. Receive the monoscope pattern. 2. Using the remote control, set the brightness and contrast to normal position. 3. Activate the adjustment mode display of Fig. 1-1 and press the channel button (07) on the remote control to select �V. SIZE�. 4. Press the VOL. UP/DOWN button on the remote control until the SHIFT quantity of the OVER SCAN on upside and downside becomes 9 ± 2%. 2-9: VERTICAL LINEARITY NOTE: Adjust after performing adjustments in section 2-8. After the adjustment of Vertical Linearity, reconfirm the Vertical Position and Vertical Size adjustments. 1. Receive the monoscope pattern. 2. Using the remote control, set the brightness and contrast to normal position. 3. Activate the adjustment mode display of Fig. 1-1 and press the channel button (08) on the remote control to select �V. LIN�. 4. Press the VOL. UP/DOWN button on the remote control until the SHIFT quantity of the OVER SCAN on upside and downside becomes minimum. 2-10: TRAPEZIUM 1. Receive the crosshatch signal from the Pattern Generator. 2. Using the remote control, set the brightness and contrast to normal position. 3. Activate the adjustment mode display of Fig. 1-1 and press the channel button (32) on the remote control to select �TRAPEZIUM�. 4. Press the VOL. UP/DOWN button on the remote control until the both vertical lines of the screen become parallel. A 2-11: PARABOLA 1. Receive the crosshatch signal from the Pattern Generator. 2. Using the remote control, set the brightness and contrast to normal position. 3. Activate the adjustment mode display of Fig. 1-1 and press the channel button (30) on the remote control to select �PARABOLA�. 4. Press the VOL. UP/DOWN button on the remote control until the right and left vertical lines are straight. 2-12: LEVEL 1. Receive the VHF HIGH (70dB). 2. Connect the AC voltmeter to pin 6 of CP101. 3. Activate the adjustment mode display of Fig. 1-1 and press the channel button (33) on the remote control to select "LEVEL". 4. Press the VOL. UP/DOWN button on the remote control until the AC voltmeter is 75 ± 2mV. 2-13: OSD HORIZONTAL 1. Activate the adjustment mode display of Fig. 1-1. 2. Press the VOL. UP/DOWN button on the remote control until the difference of A and B becomes minimum. (Refer to Fig. 2-1)
TV
00 OSD
35 B Fig. 2-1
2-14: BRIGHT CENT 1. Receive the monoscope pattern. (RF Input) 2. Using the remote control, set the brightness and contrast to normal position. 3. Activate the adjustment mode display of Fig. 1-1 and press the channel button (16) on the remote control to select "BRI CENT". 4. Press the VOL. UP/DOWN button on the remote control until the white 10% is starting to be visible 5. Receive the monoscope pattern. (Audio Video Input) 6. Press the TV/VIDEO button on the remote control to set to the AV mode. Then perform the above adjustments 2~4. 7. Press the TV/VIDEO button on the remote control to set to the CS mode. 8. Activate the adjustment mode display of Fig. 1-1 and press the channel button (16) on the remote control to select "BRI CENT". 9. Press the VOL. UP/DOWN button on the remote control to set the same step numbers as the AV mode.
D-2
|
|
|
> |
|