|
|
|
Kategorie
|
|
Informacje
|
|
Polecamy
|
|
|
 |
|
|
Dla tego produktu nie napisano jeszcze recenzji!
 ;
Dobrej jakości skan - wkońcu mogłem poznać wszystkie funkcje tego odtwarzacza - polecam .
;
Gruba instrukcja - poprostu wszystko co potrzreba - polecam .
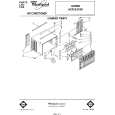
7
l
sizes. First, measure the distance from inside one window channel to the inside of the other channel and subtract X�. (See Figure 18 .) Now subtract the width of the air conditioner and divide by 2. This will give you the width to cut each filler board. Be sure to cut the filler ooard down the mid-section of its iongest measurement. Because the filler boards will be equal in width, they will automatically center your air conditioner in your window.
,Back
Measure and cut filler
board to proper
10
*Place cabinet
Fiaure 19
Ad
by turning cabinet to one side to get one filler board into window channel. Now maneuver other filler board into other window channel (see Figure 20 ). Reaching through window opening, push filler boards from outside as far toward you as they will go, Extend the mounting slides outward into the window channels on both sides. Pull the cabinet toward you to position the side mounting slides as far forward in the window channels as possible. Now mark and make a 3/32� pilot hole for each wood screw used to secure the slides in the window channels (see Figure 21). Be sure to use the foam blocks that are provided 20). CAUTION: BE SURE CABINET FALL OUT OF WINDOW. (see DOES Figure NOT
in window
I
LA<
BOARD
LEFT FILLER
I
Front
8
l
termine which will be your left and right filler boards. The holes on each board should align with the holes in the side mounting angles. Each filler board should also extend about %� above the top edge of the air conditioner cabinet. Now apply 3/8�-wide seal strips on the room side of each filler board as shown in Figure 19 (i.e. along the bottorn edge and window channel edge). Also place a seal strip along the top outside edge of each filler board. Now attach the filler boards to the side mounting angles with four, 3/8�, round headed sheet metai screws. Tighten the screws only loosely, so the filler boards can be moved back and forth.
Apply
seal strips and attach filler
boards. De-
9
. Insert
top mounting
side mounting
channel.
slides all the way
into
|
|
|
> |
|