|
|
|
Kategorie
|
|
Informacje
|
|
Polecamy
|
|
|
 |
|
|
Dla tego produktu nie napisano jeszcze recenzji!
 ;
jedyne do czego mogę mieć zastrzeżenie to jakość zdjęć zawartych w przesłanej instrukcji serwisowej ponieważ są fatalnej jakości, praktycznie nieczytelne. tak poza tym jestem zadowolony to jest to czego szukałem.
 ;
Wszystko w porządku.
Instrukcja czytelna i kompletna.
Dziękuję.
all right!
thank you.
;
Bardzo dobra instrukcja. Zawiera wszystko co potrzeba, polecam!
;
Instrukcja jest OK. Schematy czytelne, opisane niektóre procedury.
;
Instrukcja bardzo czytelna. zawiera co potrzeba. Polecam
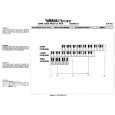
Disassembly
C115
Removing and Replacing the LCD Screen
1. 2. Remove the antenna module as described earlier. Gently pry the LCD screen away from the Transceiver board. Seven latches hold it in place (three on each side and one by the speaker at the top).
Figure 15. Pry the LCD screen away from the Transceiver board 3. 4. 5. Detach the cable connecting the LCD screen to the Transceiver board. To replace it, gently solder the cable to the Transceiver board then mount the LCD. Restore the antenna module and other parts.
Removing and Replacing the LCD Shielding Case
1. 2. Remove the LCD screen as described earlier. Gently pry the LCD shielding case away from the LCD screen.
Figure 16. Pry the LCD shielding case away 3. 4. To replace it, mount the LCD shielding case over the LCD screen. Restore the LCD screen and other parts.
22
June 1, 2004
|
|
|
> |
|