|
Dla tego produktu nie napisano jeszcze recenzji!
 ;
Dokładna dokumentacja, pomogła w szybkiej naprawie telewizora. Dziękuję!
 ;
jedyne do czego mogę mieć zastrzeżenie to jakość zdjęć zawartych w przesłanej instrukcji serwisowej ponieważ są fatalnej jakości, praktycznie nieczytelne. tak poza tym jestem zadowolony to jest to czego szukałem.
;
Wszystko w porządku.
Instrukcja czytelna i kompletna.
Dziękuję.
all right!
thank you.
;
Bardzo dobra instrukcja. Zawiera wszystko co potrzeba, polecam!
;
Instrukcja jest OK. Schematy czytelne, opisane niektóre procedury.
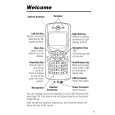
Level 1 and 2 Service Manual
Disassembly
Removing and Replacing the Endo Housing
G
Other C330 series phone housings appear differently. The endo housing removal procedure is essentially the same for each type of housing.
1. 2.
3.
Remove the rear housing cover, and SIM as described in the procedures. Insert the plastic disassembly tool between the front housing and the endo housing to release the endo housing catches along the sides of the front housing as shown in Figure 8. Lift the endo housing out of the front housing.
DISASSEMBLY TOOL
ENDO HOUSING
FRONT HOUSING
ENDO HOUSING
FRONT HOUSING
021027
021027o
Figure 8. Removing the Endo Housing 4. 5. To replace, align the endo housing with the front housing. Carefully and gently lower the endo housing into the front housing until the catches along the sides of the front housing snap into position.
6809456A82
January 23, 2003
25
|