|
Dla tego produktu nie napisano jeszcze recenzji!
 ;
jedyne do czego mogę mieć zastrzeżenie to jakość zdjęć zawartych w przesłanej instrukcji serwisowej ponieważ są fatalnej jakości, praktycznie nieczytelne. tak poza tym jestem zadowolony to jest to czego szukałem.
 ;
Wszystko w porządku.
Instrukcja czytelna i kompletna.
Dziękuję.
all right!
thank you.
;
Bardzo dobra instrukcja. Zawiera wszystko co potrzeba, polecam!
;
Instrukcja jest OK. Schematy czytelne, opisane niektóre procedury.
;
Instrukcja bardzo czytelna. zawiera co potrzeba. Polecam
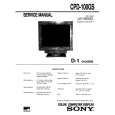
CPD-200GS
2-4. PICTURE TUBE REMOVAL
� Remove the D, A and J boards (Refer to 2-3.)
2 Neck assy
3 Deflection yoke 4 Four screws
(Tapping screw 5)
5 Picture tube shield
1 Anode cup
6 Picture tube
Cushion
� REMOVAL OF ANODE-CAP
NOTE: Short circuit the anode of the picture tube and the anode cap to the metal chassis, CRT shield or carbon painted on the CRT, after removing the anode.
� REMOVING PROCEDURES
c
b a
Anode Button
1 Turn up one side of the rubber cap in the direction indicated by the arrow a.
2 Using a thumb pull up the rubber cap firmly in the direction indicated by the arrow b.
� HOW TO HANDLE AN ANODE-CAP
1 Don�t hurt the surface of anode-caps with shartp shaped material! 2 Don�t press the rubber hardly not to hurt inside of anode-caps! A material fitting called as shatter-hook terminal is built in the rubber. 3 Don�t turn the foot of rubber over hardly! The shatter-hook terminal will stick out or hurt the rubber.
3 When one side of the rubber cap is separated from the anode button, the anode-cap can be removed by turning up the rubber cap and pulling up it in the direction of the arrow c.
2-2
|