LCX130EZ Ilość: 1
$4.99
» Pokaż Szczegóły
CSA125KHCUA125KH Ilość: 1
$4.99
» Pokaż Szczegóły
TXL5 Ilość: 1
$4.99
» Pokaż Szczegóły
RC8900XAQ1 Ilość: 1
$4.99
» Pokaż Szczegóły
MDB4100AWX Ilość: 1
$4.99
» Pokaż Szczegóły
DCX99Z Ilość: 1
$4.99
» Pokaż Szczegóły
LGR5636JQ0 Ilość: 1
$4.99
» Pokaż Szczegóły
CCT540W Ilość: 1
$4.99
» Pokaż Szczegóły
BDL4211V/27B Ilość: 1
$4.99
» Pokaż Szczegóły
VPRJ215581 Ilość: 1
$4.99
» Pokaż Szczegóły
KV25E1A Ilość: 1
$4.99
» Pokaż Szczegóły
VEM604-0 Ilość: 1
$4.99
» Pokaż Szczegóły
8ET14GKXFN02 Ilość: 1
$4.99
» Pokaż Szczegóły
DU840CWDB5 Ilość: 1
$4.99
» Pokaż Szczegóły
DMP502 TARABAN Ilość: 1
$4.99
» Pokaż Szczegóły
DV-C36/KUXQ/CA Ilość: 1
$4.99
» Pokaż Szczegóły
C935 Ilość: 1
$4.99
» Pokaż Szczegóły
EL-1607P Ilość: 1
$4.99
» Pokaż Szczegóły
AKB 063/EE B WP Ilość: 1
$4.99
» Pokaż Szczegóły
STR-7015 Ilość: 1
$4.99
» Pokaż Szczegóły
672S,20673 Ilość: 1
$4.99
» Pokaż Szczegóły
ACQ082XK0 Ilość: 1
$4.99
» Pokaż Szczegóły
CDX-C590 Ilość: 1
$4.99
» Pokaż Szczegóły
V680 Ilość: 1
$4.99
» Pokaż Szczegóły
KV29FC60D Ilość: 1
$4.99
» Pokaż Szczegóły
SHN5001D-7A Ilość: 1
$4.99
» Pokaż Szczegóły
LSB6400LW0 Ilość: 1
$4.99
» Pokaż Szczegóły
SF514ESRN0 Ilość: 1
$4.99
» Pokaż Szczegóły
RF385PXEN0 Ilość: 1
$4.99
» Pokaż Szczegóły
MK 1114/0-R/1 Ilość: 1
$4.99
» Pokaż Szczegóły
ET25DKXBB00 Ilość: 1
$4.99
» Pokaż Szczegóły
EV190NXSW00 Ilość: 1
$4.99
» Pokaż Szczegóły
KSRS22QDWH02 Ilość: 1
$4.99
» Pokaż Szczegóły
GD2LHGXLB01 Ilość: 1
$4.99
» Pokaż Szczegóły
HFC22/04 Ilość: 1
$4.99
» Pokaż Szczegóły
RAP7244DW0 Ilość: 1
$4.99
» Pokaż Szczegóły
WKC3060 Ilość: 1
$4.99
» Pokaż Szczegóły
HE-701HT Ilość: 1
$4.99
» Pokaż Szczegóły
SE6445 Ilość: 1
$4.99
» Pokaż Szczegóły
QW1644 (SM552) Ilość: 1
$4.99
» Pokaż Szczegóły
5KSB52SGR5 Ilość: 1
$4.99
» Pokaż Szczegóły
ET14JKYAW00 Ilość: 1
$4.99
» Pokaż Szczegóły
IVU 1343/2 Ilość: 1
$4.99
» Pokaż Szczegóły
THI21TW Ilość: 1
$4.99
» Pokaż Szczegóły
7643773010 Ilość: 1
$4.99
» Pokaż Szczegóły
TX29PS2F Ilość: 1
$4.99
» Pokaż Szczegóły
ED5PHAXSL02 Ilość: 1
$4.99
» Pokaż Szczegóły
CM2098ME Ilość: 1
$4.99
» Pokaż Szczegóły
A3300SX Ilość: 1
$4.99
» Pokaż Szczegóły
RT21AKXGW01 Ilość: 1
$4.99
» Pokaż Szczegóły
ZV105RM Ilość: 1
$4.99
» Pokaż Szczegóły
RJE360BW0 Ilość: 1
$4.99
» Pokaż Szczegóły
ARE640 Ilość: 1
$4.99
» Pokaż Szczegóły
XF-4141ZM-91 Ilość: 1
$4.99
» Pokaż Szczegóły
21PT3722/59B Ilość: 1
$4.99
» Pokaż Szczegóły
XLMP45H Ilość: 1
$4.99
» Pokaż Szczegóły
KV2220ES Ilość: 1
$4.99
» Pokaż Szczegóły
CT906 Ilość: 1
$4.99
» Pokaż Szczegóły
4KSM90PSAC0 Ilość: 1
$4.99
» Pokaż Szczegóły
AWO 8126 Ilość: 1
$4.99
» Pokaż Szczegóły
W sumie: $299.40
 
English Polski Spanish 
Szukaj instrukcji do
 

(e.g. AA-V20EG JVC, ZX-7 Sony )
PayPal 1000+ rating Secure, Encrypted Checkout.
 
Kategorie
Informacje
Polecamy
Strona główna >> WHIRLPOOL >> CRE9300BCW Instrukcja Obsługi
 
 60 szt. w koszyku 

WHIRLPOOL CRE9300BCW
Instrukcja Obsługi


Tweetnij o tym produkcie a dostaniesz $1.00 rabatu!
  • Plik do pobrania
  • Format PDF
  • Kompletna instrukcja
  • Język: English
Cena: $4.99

Opis WHIRLPOOL CRE9300BCW Instrukcja Obsługi

Kompletna instrukcja obsługi w formie pliku PDF. Plik PDF zostanie dostarczony na Twój adres email po jego zakupieniu.

Instrukcje obsługi (czasami nazywane także podręcznikiem użytkownika) opisuja funkcje i sposób działania danego produktu.

Instrukcja jest dostępna w następujących językach: English

Plik nie jest jeszcze gotowy
Musisz najpierw dokonać zakupu.

Recenzje produktu
Dla tego produktu nie napisano jeszcze recenzji!

Tekstowy podgląd strony 13 (kliknij aby zobaczyć)
Preparing

for the Self-Clean

Cycle

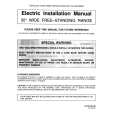
1. Remove oven racks and any pans, utensils or the broiler pan from tile oven. The oven racks should be washed by hand. If left in the oven during the self-clean cycle, the racks will become permanently discolored and may not slide easily after a dean eyrie. 2. Clean the oven frame and door frame with a nonabrasive cleaning agent such as Bon Ami. These Example of clean cycle starting at 12:00 and stopping at 3:00. NOTE: Be sure STABT knob is in the OUT position and is the same time as the clock. To Cancel Clean Cycle areas are not exposed to cleaning temperatures and should be cleaned to prevent soil fi-om baking on dm'ing the clean cycle. 3. Wipe up any excess grease or spillovers from the oven bottom to prevent excessive smoking and flareups during the clean cycle. 4. Wipe up acid spillovers such as lemon juice, tomato sauce or milk-based sauces and sugaD" spilhwers. Porcelain enamel is acid resistant, not acid proof� The porcelain finish may discolor if acid spills are not wiped up prior to a self-dean cycle, 5. Do not use oven cleaners or oven liner protective coatings of any kind on the self-dean oven finish or around any part of the oven as they will damage the oven finish, 6. To prevent damage, do not clean or rnb the gasket on the front oven frame. The gasket is designed to seal in heat during the clean cycle. 7. Turn off the oven light before starting the self-clean operation. If the oven light is left on during the clean cycle, the light bulb will burn out. Setting Cycle the Controls for the Self-Clean

1. Turn STOP knob mltil knob pops out. 2. Turn OVEN SET knob to OFF. 3. If the lock lever can be easily moved to the left, unlock oven door. If the lock lever does not easily' move to the left, allow oven to cool up to ] hour dmn unlock the door. Door and latch will be damaged if the latch is forced to the left be}bre the internal lock is disengaged. After the Self-Clean Cycle About one hour ai}er the clean cycle is complete, the internal lock will disengage and the door lever can be returned to its original position. The oven will still be hot. Turn the OVEN SET knob to OFF. Some soil may leave a light gn\v, powder)' ash which can be remuved with a damp cloth. If soil remains, it indicates that tim clean cycle was not long enough or a large spillovcr was not wiped up before the self-clean cycle. The soil should be removed during the next clean cycle. If the oven racks were let} in the oven dm-ing the selfclean cycle and do not slide smoothly, wipe the rack edges and rack supports with a small amount of vegetable oil to restore the ease of movement. Fine hair-like lines may appear in the oven interior or oven door. This is a normal condition resulting from the heating and cooling of the poreekdn finish. These lines do not affect the performance of tbe oven.

1. Close the oven door and move the door lock lever to the right until it rests in the lock position, 2. Turn the OVEN SET knob to CLEAN. 3. Turn the OVEN TEMP knob to CLEAN. 4. Toset clean time forup to3hours, push ln and turn STOP knob ahead 3 hours. (The maximum clean cycle is 3 hours.)

PAGE 12

Klienci kupując ten produkt kupili także


Za darmo!

CRE9300BCW WHIRLPOOL
Instrukcja Instalacji

Kompletna instrukcja instalacji urządzenia w formie pliku PDF.Po zakupieniu tej instrukcji wyślemy…
>
Parse Time: 0.28 - Number of Queries: 312 - Query Time: 0.092