|
Dla tego produktu nie napisano jeszcze recenzji!
 ;
jedyne do czego mogę mieć zastrzeżenie to jakość zdjęć zawartych w przesłanej instrukcji serwisowej ponieważ są fatalnej jakości, praktycznie nieczytelne. tak poza tym jestem zadowolony to jest to czego szukałem.
 ;
Wszystko w porządku.
Instrukcja czytelna i kompletna.
Dziękuję.
all right!
thank you.
;
Bardzo dobra instrukcja. Zawiera wszystko co potrzeba, polecam!
;
Instrukcja jest OK. Schematy czytelne, opisane niektóre procedury.
;
Instrukcja bardzo czytelna. zawiera co potrzeba. Polecam
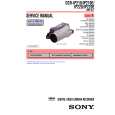
Recording moving pictures on a �Memory Stick� � MPEG MOVIE recording Self-timer MPEG MOVIE recording
You can record pictures on the �Memory Stick� with the self-timer. You can also use the Remote Commander for this operation.
(1) Set the POWER switch to MEMORY. (2) Press FN and go to PAGE2. (3) Press SELFTIMER. The (self-timer) indicator appears on the LCD screen. (4) Press EXIT to make PAGE2 disappear. (5) Press START/STOP. Self-timer starts counting down from about 10 with a beep. In the last two seconds of the countdown, the beep gets faster, then recording starts automatically.
START/STOP
5
3
SELF TIMER
2
FN
PAGE2
To stop the countdown
Press START/STOP. To restart the countdown, press START/STOP again.
To cancel the self-timer recording
Press SELFTIMER in PAGE2 screen so that the (self-timer) indicator disappears on the LCD screen. You cannot cancel the self-timer recording using the Remote Commander. Note The self-timer recording mode is automatically canceled when: � Self-timer recording is finished. � You turn NIGHTSHOT/NIGHTFRAMING to the other position while the self-timer is counting down. � The POWER switch is turned to the other position.
132
|