|
|
|
Kategorie
|
|
Informacje
|
|
Polecamy
|
|
|
 |
|
|
Dla tego produktu nie napisano jeszcze recenzji!
 ;
Wszystko w porządku.
Instrukcja czytelna i kompletna.
Dziękuję.
all right!
thank you.
;
Bardzo dobra instrukcja. Zawiera wszystko co potrzeba, polecam!
 ;
Instrukcja jest OK. Schematy czytelne, opisane niektóre procedury.
;
Instrukcja bardzo czytelna. zawiera co potrzeba. Polecam
;
...instrukcja serwisowa w pełni czytelna i kompletna. Dziękuję!
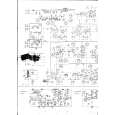
FH-MG6406ZH
- How to remove the Pickup unit
1. Remove the pulling spring, torsion spring and Eshaped ring. Then remove the Clamper arm. * The spring (A) will be removed with the Clamper arm. Pulling spring E-shaped ring Clamper arm
Torsion spring
Fig.7 2. Slide the Clamp UP lever (B) to remove it. 3. Loosen the 2 screws. Remove the feed-screw cover by sliding it. 4. Remove the feed-screw pressure spring (D). 5. Loosen the 2 screws. Remove the feed-screw holder (E). 6. Remove the belt. 7. Remove the Pickup unit together with the feed screw. * Be careful not to lose the shaft holders at the both ends of the feed screw. * Be careful not to damage the 2 flexible PCBs(for the Pickup and motor) when separating them. The flexible PCBs have been stuck each other with doublesided adhesive tape.
Carriage motor Pickup unit
Black White
Belt
Feed screw
Fig.8
8. Loosen the 2 screws. Remove the plate spring and the rack. 9. Pull out the feed screw from the Pickup unit. Grease (Yellow: PG-641) Feed screw
Plate spring Rack Grease (White: KD-1) Grease (Yellow: PG-641)
Pickup unit Fig.9
75
|
|
|
> |
|