|
|
|
Kategorie
|
|
Informacje
|
|
Polecamy
|
|
|
 |
|
|
Dla tego produktu nie napisano jeszcze recenzji!
 ;
Dobrej jakości skan - wkońcu mogłem poznać wszystkie funkcje tego odtwarzacza - polecam .
;
Gruba instrukcja - poprostu wszystko co potrzreba - polecam .
� Recording �
Recording Features
Specifying recording length - One Touch Timer Recording (OTR)
The One-touch Timer Recording feature provides a simple and convenient way to make a timed recording.
EXAMPLE: One-touch Timer Recording for 30 minutes. When a TV is connected with an audio/video cable, turn the TV on and select the video input mode on the TV.
Timer Recording
Timer recording can be programmed on-screen with the remote control. The built-in timer allows automatic unattended recording of up to 8 programs within 1 month.
NOTES:
1
Load a cassette tape with the erase prevention tab intact.
� After timer recording is completed, the VCR turns off automatically. � You can program the timer recording while a regular recording is in progress; the menu screens will not be recorded. � The timer recording will start at 20 seconds before the time you predetermined.
2
Press SP/EP to select the desired tape speed SP or EP. The counter and SP or EP will appear on the screen for about 4 seconds.
00 : 00 : 00 SP
EXAMPLE: Program a timer recording for the 26th day, channel 125 (CATV), 11:00 - 11:30 PM on timer program number 1 (Tape speed: EP). When a TV is connected with an audio/video cable, turn the TV and this VCR on and select the video input mode on the TV.
3
Press the Number keys or CH �/+ to select the channel to be recorded. The channel number will appear on the screen and display for about 4 seconds. Press REC on the VCR or while holding REC, press PLAY ( ) on the Remote to begin recording. Press REC on the VCR again to stop recording after 30 minutes. Each additional press of REC will increase recording time as shown in the chart below, up to a maximum of 5 hours. The OTR
1
CH 125
Press MENU on the Remote. Check the �TIMER REC SET� option is selected, then press ENTER.
MENU CLOCK SET TIMER REC SET AUTO REPEAT ON OFF CH SET UP LANGUAGE/IDIOMA/LANGUE NO NOISE BACKGROUND ON OFF �+/�/ENTER/MENU�
DATE START END CH
2
OTR 0 : 30 CH 125
Press SET �/+ to select one of the program lines, then press ENTER. Press SET �/+ to select the date, then press ENTER. Set the start time, end time, channel and tape speed as in step 3. NOTE: To record from external source, press SET �/+ and set the channel to
4
3 4
����� ����� ����� ����� ����� ����� ����� ��+� � � �
DATE
/�/ENTER/CANCEL/MENU
START END CH
�:�� �:�� �:�� �:�� �:�� � �� � :: � � �:��
�:�� �:�� �:�� �:�� �:�� � �� � :: � � �:��
�� �� �� �� �� �� �� � ��
� � � � � � � �
26(SU)
and recording time will appear on screen for about 4 seconds. NOTES: � Press REC to increase Press the time needed for recording (See the chart ). � To cancel OTR, press STOP ( ) or turn off the power.
once twice 3 times 4 times 5 times 6 times 7 times 8 times 9 times
�+/�/ENTER/CANCEL/MENU�
--------------------------
-:--:--:--:--:--:--
-:--:--:--:--:--:--:--
---------------
-
Recording time
NORMAL REC
"L". "L" will appear next to CH 125 (or 69).
5
0:30 1:00 1:30 2:00 3:00 4:00 5:00
NORMAL REC
To enter other programs, repeat step 2 through 4. Or, press MENU twice to return to the normal screen. Press TIMER on the Remote. The power will go off, the TIMER indicator will light and the VCR stands by for recording.
6
Watching one program while recording another
During recording� � If you connect the TV and the VCR only using the RF connection to view pictures from the VCR, press TV/VCR on the Remote so that TV/VCR indicator goes off. (The TV broadcast being recorded disappears.) � If you are using the AV connection to view pictures from the VCR, change the TV�s input mode from AV to TV. Then, select the channel you want to watch, on the TV.
To use the VCR while it is in timer recording standby mode Press TIMER. After you use the VCR, press TIMER again to put the VCR into timer recording standby mode.
 $4.99 HR-J4010UM JVC
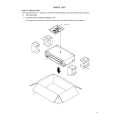
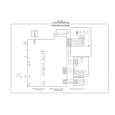
Schematy Zestaw schematów dla tego urządzenia. Plik PDF zawierający schematy będzie dostarczony na Twó…
|
|
|
> |
|