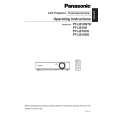
|
Dla tego produktu nie napisano jeszcze recenzji!
 ;
...instruction is ok.
...instrukcja jest ok.
Thanks/Dzięki
;
Documentation made available quickly and It is good quality. Thanks.
file:///E|/PTLB10/ALL/PT-LB10NTU/SVC/s0707000000.html
7.7 Removal of K-P.C.Board
TOP PREVIOUS NEXT 1. Remove the analysis block, LCD block and lens according to the steps 1 through 3 in the section 7.11. "Removal of Analysis Block and Lens". 2. Unscrew the screws (PT-LB10NTU/E: 1, Others: 3) and remove the grounding metal.
3. Unscrew the 2 screws and remove the lamp unit terminal. 4. Unscrew the 2 screws and remove the exhaust fan and speaker block. 5. Unscrew the 2 screws and remove the lamp house and thermofuse attachmemt fittings. 6. Unscrew the 2 screws and remove the K-P.C.Board.
TOP PREVIOUS NEXT
file:///E|/PTLB10/ALL/PT-LB10NTU/SVC/s0707000000.html [2006-01-16 14:01:47]
|