|
|
|
Kategorie
|
|
Informacje
|
|
Polecamy
|
|
|
 |
|
|
Dla tego produktu nie napisano jeszcze recenzji!
 ;
jedyne do czego mogę mieć zastrzeżenie to jakość zdjęć zawartych w przesłanej instrukcji serwisowej ponieważ są fatalnej jakości, praktycznie nieczytelne. tak poza tym jestem zadowolony to jest to czego szukałem.
 ;
Wszystko w porządku.
Instrukcja czytelna i kompletna.
Dziękuję.
all right!
thank you.
;
Bardzo dobra instrukcja. Zawiera wszystko co potrzeba, polecam!
;
Instrukcja jest OK. Schematy czytelne, opisane niektóre procedury.
;
Instrukcja bardzo czytelna. zawiera co potrzeba. Polecam
2 ADJUSTMENTS AND CHECKS
調��確�
2-1 Test Mode
In Standby mode, press and hold the stop + play + pause keys simultaneously for 5 seconds. The display will show the model name and the system controller�s version number, and the test mode is initiated. Press the stop key to exit from the test mode and return to the standby mode.
2-1 ������
ã�¹ã�¿ã�³ã��ã�¤ã�¢ã�¼ã��ã�®ç�¶æ��ã�§ã��stop ã�ã�¼ï¼� play ã�ã�¼ï¼� pause ã� ã�¼ã��5ç§�é��æ�¼ã��ç¶�ã��ã��ã�¨ã��表示é�¨ã�«æ©�種å��ã�¨ã�·ã�¹ã�³ã�³ã�® Version No. ã��表示ã��ã��ã��ã�¹ã��ã�¢ã�¼ã��ã�«å�¥ã��ã�� stop ã�ã�¼ã��æ�¼ã��ã�¨ã��ã��ã�¹ã��ã�¢ã�¼ã��ã�¯çµ�äº�ã��ã�¹ã�¿ã�³ã��ã�¤ã�¢ã�¼ã��ã�« æ�»ã��ã��
2-1-1 Front key check
1. Press the play key to enter the front key check mode. 2. The display shows the name of each key to be checked; press the corresponding key. When the check result of the key is OK, the display shows another key name. When the result is No Good, the display continues to show the same key name. 3. When all of the keys have been checked, the display shows "vol50,dial50". Check the multi jog dial to confirm that the figure after "dial" increases when the dial is rotated clockwise and decreases when it is rotated counterclockwise. 4. Then check the rec level control to confirm that the figure after "vol" increases when the control is rotated clockwise and decreases when it is rotated counterclockwise. 5. Press the play key to exit from the front key check mode and return to the Version number display mode.
2-1-1 ã��ã�ã�³ã��ã�ã�¼ã��ã�§ã��ã�¯
1. play ã�ã�¼ã��æ�¼ã��ã��ã��ã�ã�³ã��ã�ã�¼ã��ã�§ã��ã�¯ã�¢ã�¼ã��ã�«å�¥ã��ã�� 2. 表示é�¨ã�«ã��ã�§ã��ã�¯ã��ã��ã�ã�¼ã�®å��称ã��表示ã��ã��ã��ã�®ã�§ã��ã��ã�®ã� ã�¼ã��æ�¼ã��ã�� ã��ã�§ã��ã�¯OKã�ªã��次ã�®ã�ã�¼ã�®å��称ã��表示ã��ã��ã��NGã�ªã��表示ã�¯ å¤�å��ã��ã�ªã��ã�� 3. ä¸� é�� ã�� ã� ã�¼ ã�® 確 èª� ã�� çµ� äº� ã�� ã�� ã�¨ ã��ã�� ã�£ ã�¹ ã�� ã�¬ ã�¤ ã�« â��vol50,dial50â�� ã�¨è¡¨ç¤ºã��ã��ã��ã��multi jog ã��å��ã��ã�� â��dialâ�� å�´ã�®æ�°å�ã��å�³å��ã��ã�§å¢�å� ã��å·¦å��ã��ã�§æ¸�å°�ã��ã��ã��ã�¨ã�� 確èª�ã��ã��ã�� 4. 次ã�« rec level ã��å��ã��ã�� â��volâ�� å�´ã�®æ�°å�ã��å�³å��ã��ã�§å¢�å� ã��å·¦ å��ã��ã�§æ¸�å°�ã��ã��ã��ã�¨ã��確èª�ã��ã��ã�� 5. play ã�ã�¼ã��æ�¼ã��ã�¨ã��ã��ã�ã�³ã��ã�ã�¼ã��ã�§ã��ã�¯ã�¢ã�¼ã��ã��çµ�äº�ã�� Version No. 表示ã�«æ�»ã��ã��
2-1-2 Display check
1. Press the display key to enter the display check mode. 2. Press display key a few times and ensure that each press lights the display blocks one after another. 3. When all the indicators are lit, press the display key to exit from the display check mode and return to the Version number display mode.
2-1-2 ����������
1. display ã�ã�¼ã��æ�¼ã��ã��ã��ã�£ã�¹ã��ã�¬ã�¤ã��ã�§ã��ã�¯ã�¢ã�¼ã��ã�«å�¥ã��ã�� 2. display ã�ã�¼ã��æ�¼ã��ã��ã�³ã�«ã��表示é�¨ã��ã��ã�ã��ã�¯ã��ã�¨ã�«ç�¹ç�¯ã�� ã�¦è¡�ã��ã��ã�¨ã��確èª�ã��ã��ã�� 3. 表示é�¨ã��å�¨ç�¹ç�¯ã��ã��ç�¶æ��ã��ã�� display ã�ã�¼ã��æ�¼ã��ã�¨ã��ã��ã�£ã�¹ ã��ã�¬ã�¤ã��ã�§ã��ã�¯ã�¢ã�¼ã��ã��çµ�äº�ã�� Version No. 表示ã�«æ�»ã��ã��
2-1-3 EEPROM default setting
1. Press the erase key. This writes the default values in the EEPROM and checks the written data. When the default data is written correctly, the display shows �EEPROM OK !!�. If not, it shows �EEPROM NG !!�. 2. Press the erase key again to return to the Version number display mode.
2-1-3 EEPROM ã��ã��ã�©ã�«ã��è¨å®�
1. erase ã�ã�¼ã��æ�¼ã��ã�� EEPROMã�«ã��ã��ã�©ã�«ã��å�¤ã��æ�¸ã��è¾¼ã�¿ã��è�ªå��ç��ã�«æ�¸ã��è¾¼ã�¿ã��ã�§ ã��ã�¯ã��è¡�ã��ã��ã��ã�®ã�¨ã��ã��æ£ã��ã��æ�¸ã��è¾¼ã��ã�¦ã��ã��ã�°ã��表示é�¨ã�« â��EEPROM OK !!â�� ã�¨è¡¨ç¤ºã��ã��ã��ä¸�è�¯ã�®å ´å��ã�¯ â��EEPROM NG !!â�� ã�¨è¡¨ç¤ºã��ã��ã��ã�� 2. å��度 erase ã�ã�¼ã��æ�¼ã��ã�¨ã��Version No. 表示ã�«æ�»ã��ã��
2-1-4 Total recording time display
1. When the record key is pressed, the display shows the time in which the pickup outputs the recording power (in the unit of hour). 2. Press the record key again to return to the Version number display mode.
2-1-4 ������表示
1. record ã�ã�¼ã��æ�¼ã��ã�¨ã��ã��ã��ã�¯ã�¢ã��ã��ã��è¨�é�²ã��ã�¯ã�¼ã��å�ºå��ã��ã�� æ��é��ã��表示ã��ã��ã�� ï¼�å��ä½�ï¼�hourï¼� 2. å��度 record ã�ã�¼ã��æ�¼ã��ã�¨ã��Version No. 表示ã�«æ�»ã��ã��
�3�
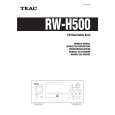
 $4.99 RW-H500 TEAC
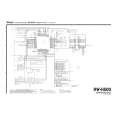
Schematy Zestaw schematów dla tego urządzenia. Plik PDF zawierający schematy będzie dostarczony na Twó…
|
|
|
> |
|