|
|
|
Kategorie
|
|
Informacje
|
|
Polecamy
|
|
|
 |
|
|
Dla tego produktu nie napisano jeszcze recenzji!
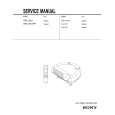
1-20 VPL-HS1
Replacing the Lamp
3 Open the lamp cover by loosening a screw with the Philips screwdriver.
Notes � Do not put your hands into the lamp replacement spot, or not fall any liquid or object into it to avoid electrical shock or fire. � Be sure to use the LMP-H120 Projector Lamp for replacement. If you use lamps other than LMP-H120, the projector may cause a malfunction. � Be sure to turn off the projector and unplug the power cord before replacing the lamp.
3 Push the knob on the filter cover to remove the filter cover.
Knob
The lamp used for the light source has a certain life. When the lamp dims, the color balance of the picture becomes strange, or �Please replace the LAMP.� appears on the screen, the lamp is exhausted. Replace the lamp with a new one (not supplied).
Use LMP-H120 Projector Lamp as the replacement lamp.
Disposal of used projector lamp As the materials used in this lamp are similar to those of a fluorescent lamp, you should dispose of a used projector lamp in the same way as a fluorescent lamp. 4 Remove the filter holder. 4 Loosen the two screws on the lamp unit with the Philips screwdriver. Pull out the lamp unit by the handle.
When replacing the lamp after using the projector Turn off the projector, then unplug the power cord. Wait for at least an hour for the lamp to cool.
Caution The lamp becomes a high temperature after turning off the projector with the @/1 (on/standby) switch. If you touch the lamp, you may scald your finger. When you replace the lamp, wait for at least an hour for the lamp to cool.
Replacing the Air Filter
5 Remove the air filter from the filter holder by holding the tab on the air filter.
Air filter Filter holder
1 2 1
3
The air filter should be replaced periodically. When �Please replace the filter.� appears on the screen, replace the air filter immediately.
Notes � Replacing the air filter is very important to maintain the high efficiency of the projector and to prevent a malfunction. When the replacement message appears on the screen, replace the air filter without delay. � When removing the air filter from the projector, be careful that no dust or object gets into the inside of the projector.
Tab
1 Place a protective sheet (cloth) beneath the projector. Turn the projector over so you can see its underside.
Note Be sure that the projector is stable after turning it over.
6 Insert the new air filter into the filter holder with the white surface up, then replace it in the projector. 7 Replace the filter cover. 8 Attach the adjuster.
2 Slide the release lever on the adjuster outward and turn the adjuster clockwise to remove the adjuster.
2 3 1 Release lever
5 With the lamp surface facing toward the rear of the projector, insert the new lamp all the way in until it is securely in place. Tighten the two screws. Fold up the handle.
Notes � Be careful not to touch the glass surface of the lamp. � The power will not turn on if the lamp is not secured properly.
1 Place a protective sheet (cloth) beneath the projector. Turn the projector over so you can see its underside.
Note Be sure that the projector is stable after turning it over.
6 Close the lamp cover and tighten the screws. 7 Attach the adjuster. 8 Turn the projector back over. 9 Connect the power cord and turn the projector to standby mode.
2 Slide the release lever on the adjuster outward and turn the adjuster clockwise to remove the adjuster.
2 3 1 Release lever
GB
Others
Others
10 Press the following buttons on the control panel in the following order for less than five seconds each: RESET, <, ,, ENTER.
38
Replacing the Lamp
Replacing the Air Filter
39 GB
|
|
|
> |
|