|
|
|
Kategorie
|
|
Informacje
|
|
Polecamy
|
|
|
 |
|
|
Dla tego produktu nie napisano jeszcze recenzji!
TP-VS535 (YU) ESF Page 2
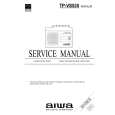
ENGLISH
ESPA�OL
FRAN�AIS
I
INSERTING A CASSETTE � I
Insert a cassette with the recording/playback side a facing the cassette holder.
INSERCI�N DE UN CASSETE � I
Inserte un cassete con el lado a de grabación/borrado dirijido hacia la cassetera.
INSERRER UNE CASSETTE � I
Inserrez une cassette en mettant la face de l�enregistrement/ playback a face au support de la cassette.
RECORDING FROM THE BUILT-IN MICROPHONE � J
1 Insert a cassette. 2 Orient the built-in microphone to the sound source. 3 Press the wREC button to start recording. The jPLAY button is depressed simultaneously and the OPE/BATT/REC indicator lights. The indicator lights and goes out according to the voice input.
GRABACI�N DESDE EL MICR�FONO INTERNO � J
1 Inserte un cassete. 2 Dirija el micrófono interno hacia la fuente de sonido. 3 Presione el botón de grabación wREC para comenzar la grabación. El botón jPLAY es presionado simultáneamente y los indicadores de luz OPE/ BATT/REC se encenderán. Los indicadores de luz se apagan de acuerdo a la voz de entrada.
ENREGISTRER DU MICROPHONE ENCASTR� � J
1 Inserrerz une cassette. 2 Orientez le michrophone encastré vers la source du son. 3 Pressez le bouton wREC pour commencer à enregistrer. Le bouton jPLAY est préssé simultanément et le OPE/ BATT/ REC indicateur s�allûme. L�indicateur s�allume et s�éteind suivant le son capté.
Basic operation
To stop recording Press the sSTOP button. Set the PAUSE switch in the direction of the arrow (U). The OPE/BATT/REC indicator lights. To resume recording, set the switch in the opposite direction. To pause recording
Operación básica
Para detener la grabación Para pausar la grabación Presione el botón sSTOP. Ajuste el conmutador de PAUSE en la dirección de la flecha (U). El indicador OPE/BATT/ REC se encenderá. Para continuar la grabación, ajuste el conmutador en la dirección opuesta.
Operation de base
Arrêter l�enregistrement Mettre en pause l�enregistrement
Pressez le bouton sSTOP. Mettez le switch PAUSE dirigé vers la direction de la flêche (U). L�indicateur OPE/BATT/REC s�allûme. Pour reprendre l�enregistrement ,mettez le bouton vers la direction opposée.
J
MIC SENS STOP PAUSE
1
3
� The PAUSE switch is released automatically when the sSTOP button is pressed.
� El conmutador de PAUSE es liberado automáticamente cuando el botón sSTOP es presionado.
� Le switch PAUSE est automatiquement libéré quand le bouton sSTOP est pressè.
When the end of the tape is reached during recording
The tape stops automatically.
Al llegar al final de la cinta durante la grabación
La cinta se detiene automáticamente.
Quand la fin de la cassette est atteinte au moment de l�enregistrement
La cassette s�arrête automatiquement.
To select the sensitivity of the microphone
OPE/BATT/REC
Set the MIC SENS switch according to the location of recording. HIGH: When recording in a conference etc. LOW: When recording a dialogue nearby
Para seleccionar la sensibilidad del micrófono
Ajuste el Conmutador MIC SENS (Sensibilidad del micrófono) de acuerdo a la localización de grabado. HIGH (ALTO) : Al grabar en una conferencia, etc. LOW (BAJO) : Al grabar un diálogo cercano La lectura del contador de cinta cambia durante la reproducción, grabación, avance
Pour séléctionner la sensibilité du microphone
Mettez le swich MIC SENS selon la palce de l�enregistrement . HIGH : Quand on enregistre dans une conférence etc LOW : Quand on enregistre un dialogue proche
2
Tape counter � a
K
The readout of the tape counter changes during playback, recording, fastforwarding or rewinding of the tape. To set the counter to 000, press the counter reset button b to the right of the tape counter.
Chronomêtre de la cassette � a
Contador de cinta � a
L�afficheur du chronomêtre de la cassette change durant le playback, enregistrement, éxpédition ou rebobinage rapide de la cassette. Pour mettre le chronomêtre en position de 000, remettez le bouton du chronomêtre b dirigé vers la droite du chronomêtre de la cassette.
When using the unit on the desk � K
Place it as illustrated during recording to reduce the noise.
rápido o rebobinado de la cinta. Para ajustar el contador a 000, presione el botón de reajuste (reset) b a la derecha del contador de cinta.
Quand vous utilisez l�unité sur un bureau � K Al usar la unidad en el escritorio � K
Localize la unidad como se ilustra en grabación para reducir ruido. Placez la comme illustré durant l�enregistrement pour réduire le bruit.
To record only the sound louder than the preset sound level � L
Recording will start when the unit detects sound above a certain preset level. If the unit does not detect the sound for about 4 seconds, recording will pause. This prevents tape waste and empty recording. 1 Set the V-SENSOR switch to ON. 2 Adjust the sensor level. Turn the VOL/V-SENSOR LEVEL control in the direction of a to increase the sensor level. Even relatively quiet sounds will be recorded. Turn the VOL/V-SENSOR LEVEL control in the direction of b to lower the sensor level. General background noise will not be recorded, and only relatively loud sounds will be recorded. 3 Press the wREC button to start recording.
Para grabar sólo el sonido más fuerte al nivel de sonido preajustado � L
La grabación comenzará cuando la unidad detecte sonido por sobre un cierto nivel preajustado. Si la unidad no detecta sonido durante 4 segundos, la grabación será pausada. Esto previene el malgasto de la cinta y grabaciones en blanco. 1 Ajuste el conmutador V-SENSOR a ON (encendido). 2 Ajuste el nivel del sensor. Mueva el control de VOL/V-SENSOR LEVEL en la dirección de a para incrementar el nivel del sensor. Incluso sonidos relativamente bajos en volumen serán grabados. Mueva el control de VOL/V-SENSOR LEVEL en la dirección de b para disminuir el nivel del sensor. Ruido de fondo en general no será grabado, y sólo sonidos relativamente altos en volumen serán grabados. 3 Presione el botón wREC (Grabación) para comenzar la grabación.
Enregistrer qu�un son plus élevé que prevu lors de la concéption � L
L�enregistrement commence quand l�unité détécte des bruits plus hauts qu�un certain niveau bien détérminé. Si l�unité ne détécte pas le son durant 4 secondes, l�enregistrement s�arrête. Cela empêche le gaspillage des cassettes et l�enregistrement à vide. 1 Mettez le switch V-SENSOR sur ON. 2 Réglez le niveau du détécteur. Orientez la commande de VOL/V-SENSOR LEVEL à la direction de a pour enlever le niveau du détécteur. Mêmes les sons relativement légers sont enregistrés. Orientez la commande de VOL/V-SENSOR LEVEL à la direction de b pour diminuer le niveau du détécteur. Le bruit de fond ne sera pas enregistré et seulement les sons élevés le sont. 3 Pressez le bouton wREC pour commencer a enregistrer.
L
1 2
Sensor level adjustment
The ideal sensor level varies according to the loudness of the source sound. Experiment with the sensor level in advance to determine the optimum level before you start an important recording. Usually set the VOL/V-SENSOR LEVEL control to 4 to 6 first, then adjust it according to surrounding conditions.
Ajuste del nivel del sensor
El nivel ideal del sensor varia de acuerdo a el volumen de la fuente de sonido. Experimente con el nivel del sensor con anterioridad para determinar el nivel óptimo antes de comenzar una grabación importante. Usualmente ajuste el control de VOL/V-SENSOR LEVEL de 4 a 6 al principio, luego cambie de acuerdo a las condiciones circundantes.
Réglage du niveau du détécteur
Le réglage ideal du niveau du détecteur varie selon le niveau du source de son. Vérifiez le niveau du détecteur pour déterminer le niveau utile avant de commencer un enregistrement important. Il vaut mieux mettre la commande du VOL/VSENSOR LEVEL entre 4 et 6 puis la régler selons les conditions autour.
3
Note
When the recording resumes after sound detection, the very first sounds may not be recorded.
Recording from an external microphone � M
To record sound with more clarity, use an optional external microphone. Connect the microphone to the EXT. MIC jack and set the microphone near the sound source.
Nota
Cuando la grabación continúa luego de detectar sonido, los primeros sonidos pueden no ser grabados.
Remarque
Quand l�enregistrement continue aprés la détéction du son, les sons tout au début risquent de ne pas étre enregistrés.
Enregistrer d�un microphone éxterne � M Grabación desde un micrófono externo � M
Para grabar con más claridad, use un micrófono opcional externo. Conecte el micrófono al zócalo EXT. MIC (micrófono externo) y dirija el micrófono hacia la fuente de sonido. Pour enregistrer du son plus claire, utilisez un microphone éxterne optrionnel. Connectez le microphone au plot EXT. MIC et mettez le prés de la source du son.
Note
M
Keep the microphone away from the speaker to avoid a howling noise.
To record from another unit � N
Connect the other unit to the EXT. MIC jack of this unit, using the appropriate connecting cords. a To connect to stereo source equipment b To connect to monaural source equipment c Attenuation cable d Monaural mini-plug e Stereo mini-plug
Remarque
Laissez le microphone un peu loin du haut-parleur pour éviter les bruits de hurlement.
Nota
Mantenga el microfono lejos del parlante para prevenir ruidos agudos.
Enregistrer d�une autre unité éxterne � N Para grabar desde otra unidad � N
Conecte la otra unidad al zócalo EXT. MIC (micrófono externo) de esta unidad, usando los cables de conección apropiados. a b c d e Para conectar a un equipo estéreo Para conectar a un equipo monoaureal Cable de atenuación Mini-conector monoaureal Mini-conector estéreo Connéctez l�autre unité au plot EXT. MIC de cette unité, utilisant les cordes de liages appropriées. a Pour connécter à un équipement de source stéréo b c d e Pour connecter à un équipement de source monaural Cable d�atténuation Mini-prise monaural Mini-prise stéréo
EXT. MIC
Note
� The connecting cords may vary according to the type of source equipment. Before connecting a unit, read the operating instructions of the connected unit. � If the volume setting of the source equipment is too high, the recorded sound may be noisy or distorted. Be sure to set the volume of the source equipment to a moderate level.
N a
Nota
� Los cables de conección pueden variar de acuerdo al tipo de equipo fuente. Antes de conectar a la unidad, lea las instrucciones de la unidad a conectar. � Si el ajuste del volumen del equipo fuente es muy alto, el sonido grabado puede ser ruidoso o distorsionado. Asegúrese de ajustar el volumen del equipo fuente a un nivel moderado.
Remarque
PLAYBACK � O
1 Insert a cassette. 2 Press the jPLAY button. 3 Adjust the volume.
� Les cordes de connéction peuvent varier selon le type de l�équipement de source. Avant de connécter une unité, lisez ses instructions de fonctionnement. � Si la volûme de l�équipement de source est trés élevée, le son enregistré peut être bruyant ou tordu. Assurez vous que la volûme de l�équipement de source est au niveau moyen.
PLAYBACK � O REPRODUCCI�N � O
1 Inserte un cassete. 2 Presione el botón jPLAY (Reproducción). 3 Ajuste el volumen. 1 Inserrez une cassette. 2 Préssez le bouton jPLAY. 3 Réglez la volûme.
EXT. MIC
PHONES
Basic operation
To stop playback To pause playback Press the sSTOP button. Set the PAUSE switch in the direction of the arrow (U). To resume playback, set the switch in the opposite direction.
Opération de base
Arrêter le playback Préssez le bouton sSTOP. Orientez le swich PAUSE vers le sens de la flêche (U). Pour reprendre le playback orientez le switch vers le sens opposé. � Le switch PAUSE est libéré automatiquement quand le bouton sSTOP est préssé. Mêtre en pause le playback
Operación Básica
Para detener la reproducción Para pausar la reproducción Presione el botón sSTOP. Ajuste el conmutador de PAUSE en la dirección de la flecha (U). Para continuar la reproducción, ajuste el conmutador en la dirección opuesta. � El conmutador de PAUSE es liberado automáticamente cuando el botón sSTOP es presionado.
b
The tape stops automatically.
� The PAUSE switch is released automatically when the sSTOP button is pressed.
When the end of the tape is reached during playback
EXT. MIC
EARPHONE
To find the section you want to listen to
To fast forward/rewind
To fast forward: Press the fFF/CUE button during stop mode. To rewind: Press the gREW/REV button during stop mode. Press the sSTOP button at the desired point. If the tape winds to the end, the tape stops but the fFF/CUE or gREW/REV button is not released. Press the sSTOP button to release it.
Quand la fin de la cassette est atteinte durant le playback
Elle s�arrête automatiquement.
Al llegar al final de la cinta durante la reproducción
La cinta se detiene automáticamente.
Trouver la séction que vous voulez écouter
Accélérer l�éxpédition/le rebobinage
Pour accélerer l�éxpédition: Pressez le bouton fFF/CUE au moment de l�arrêt. Pour rebobiner: Pressez le bouton gREW/REV au moment de l�arrêt. Pressez le bouton s STOP au point desiré. Si la cassette est totalement rebobinée ou expediée, elle s�arrête mais le bouton fFF/CUE ou gREW/REV n�est pas libéré. Pressez le bouton sSTOP pour le libérer.
Para encontrar la sección que desea escuchar
Para avance rápido/Rebobinado
Para avance rápido: Presione el botón fFF/CUE (avance rápido/búsqueda) durante el modo stop. Para Rebobinado: Presione el botón gREW/REV (rebobinado/búsqueda) durante el modo stop. Presione el botón sSTOP en la sección deseada. Si la cinta llega hasta el final, la cinta se detendrá pero el botón fFF/CUE (avance rápido/búsqueda) o gREW/REV (rebobinado/búsqueda) no son liberados. Presione el botón sSTOP para liberar.
To search while monitoring high-speed sound
Keep the fFF/CUE or gREW/REV button pressed during playback by monitoring the sound. When you reach the desired point, release the button to start playback.
Chercher en mettent le son à vitesse élevée
Laissez le bouton fFF/CUE ou gREW/REV appuyé au moment du playback. Quand vous arrivez au point desiré, libérez le bouton pour commencer le playback.
O
REW/REV PLAYBACK SPEED STOP PAUSE
To increase or decrease the playback speed
You can change the playback speed with the PLAYBACK SPEED control. Turn the PLAYBACK SPEED control as follows. To increase the speed To decrease the speed Turn to FAST. Turn to SLOW.
Para buscar mientras se monitorea un sonido a alta velocidad
Mantenga el botón fFF/CUE (avance rápido/búsqueda) o gREW/REV (rebobinado/búsqueda) presionado durante la reproducción mientras se monitorea el sonido. Cuando llegue a la sección deseada, libere el botón para comenzar la reproducción.
Augmenter ou diminuer la vitesse du playback
Vous pouvez changer la vitesse du playback avec la commande PLAYBACK SPEED. Orientez la commande PLAYBACK SPEED comme suit. Pour augmenter la vitesse Pour diminuer la vitesse Orientez vers FAST. Orientez vers SLOW.
1
FF/CUE
3 2
After listening, set the PLAYBACK SPEED control to the center position for playback at normal speed.
Para incrementar o disminuir la velocidad de reproducción
Se puede cambiar la velocidad de reproducción mediante el control PLAYBACK SPEED (velocidad de reproducción). Gire el control PLAYBACK SPEED (velocidad de reproducción) como sigue. Para incrementar la velocidad Para disminuir la velocidad Gire a FAST (Rápido). Gire a SLOW (Lento).
Apres avoir écouté, mettez la commande PLAYBACK SPEED en position centrale pour une vitesse normale du playback.
Luego de la audición, ajuste el control PLAYBACK SPEED (velocidad de reproducción) a la posición central para reproducir en una velocidad normal.
TP-VS535 (YU) ESF Page
|
|
|
> |
|