|
|
|
Kategorie
|
|
Informacje
|
|
Polecamy
|
|
|
 |
|
|
Dla tego produktu nie napisano jeszcze recenzji!
RECORDING
CLOCK
BONUS
LANG
CURSOR
EASY OPERATION
�� ¥� OK
OK
Adjusting Picture Alignment Manually
END: MENU
3 4
Press OK button to select this option. Result : The EASY OPERATION menu is displayed. Press the corresponding � or � buttons until the PDC/VPS DEFAULT option is selected.
BONUS
The Picture Alignment feature allows you to adjust the alignment manually to obtain the best possible picture.
AUDIO
Plus+
When noise bars or streaks appear during playback, adjust alignment manually by pressing the CH/TRK (i or j) buttons until the picture is clear and stable. Result : The tracking bar appears. The image is adjusted. The tracking bar disappears when you release the button. As each VTR is different, slight adjustments need to be made in the way the tape is read. This is called �Tracking�. When playback starts the video recorder automatically adjusts the Tracking to obtain the best possible picture and sound; Digital Auto Tracking. The �AUTO� indicator will flash while this adjustment takes place and the playback picture and sound may be distorted. The VTR will automatically adjust the Tracking as best it can. If you playback rented tapes or tapes recorded on other machines, you may occasionally find that the Digital Auto Tracking is not able to improve the picture sufficiently. In these instances you will need to adjust the Tracking manually.
ON/STANDBY CHANNEL
Note : VPS is the system used in main land Europe and PDC is used in UK
PDC/VPS DEFAULT VIDEOPLUS EXTEND AUTO POWER OFF REPEAT PLAY
:OFF :OFF :OFF :OFF
��
�
END: MENU
5 6 46
Press � button to select ON in PDC/VPS DEFAULT option. On completion, press MENU twice to exit the menu.
With a tape in and playing, hold down either the CH/TRK (i or j) button on the remote control until the best possible picture and sound is obtained To resume Automatic Digital Tracking, press the two CHANNEL buttons on the front of the VTR at the same time until the AUTO light comes on.
AUX
VIDEO
L/MONO AUDIO R
REC
If the tape is old or worm, it may be impossible to improve the picture performance. if you press the PAUSE/STILL button the image may shimmer. This can also be reduced by adjusting the Tracking.
47
BASIC OPERATION
2-22 Toshiba
66
Reference Information
RECORDING
66
Advance Recording Feature continued
VPS/PDC Default
BASIC OPERATION
Playing back
This function allows you to play back any pre-recorded cassette.
Playing a Cassette
Programme VPS/PDC is a system of felling the VTR when a programme actually starts. Typically, when you want to record a programme you will tell the VTR to start recording, probably, five minutes before the advertised starting time of the programme and to finish ten minutes or so after the programme is due to finish. So even if the programme starts early or finishes late you will normally still get to see what you wanted to record. However when live programmes over-run or the day�s television schedule is changed from that advertised, you may miss the desired programme which may have been delayed or even cancelled and the VTR will record the programme even if it is two or more, hours late.
1
CURSOR
Switch on both the television and your VTR. Insert the video cassette to be played. If the safety tab on the cassette is intact, press PLAY (�). Otherwise, the cassette is played automatically. Note : When a cassette is loaded. the tape position is optimized automatically to reduce disturbance (Digital Auto Tracking). When playing a cassette, if the end of the tape is reached, the cassette is rewound automatically. NTSC tapes can be played back but cannot be recorded with this VTR. Then pres... s (STOP). (EJECT).
2
OK
AUDIO
1
F.ADV
CLR/RST
2
Press the correspondiing �, � or ¥, � buttons to select the EASY OPERATION option.
REW
Press MENU on the remote control. Result : The programming menu is displayed.
PLAY
STOP EJECT
3
FF
To.. Stop the playback Eject the cassette
w
PROG
OPTIONS
INSTALL
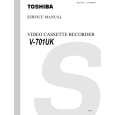
 $4.99 V-701UK TOSHIBA
Schematy Zestaw schematów dla tego urządzenia. Plik PDF zawierający schematy będzie dostarczony na Twó…
|
|
|
> |
|