|
|
|
Kategorie
|
|
Informacje
|
|
Polecamy
|
|
|
 |
|
|
Dla tego produktu nie napisano jeszcze recenzji!
GENERAL INFORMATION
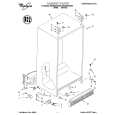
Connection Only one amplifier at a time can be connected to your WorkingMan�s speaker enclosure. DO NOT plug two amplifiers into one speaker enclosure, as it will not work and may damage your system. Always complete your amplifier-to-speaker and speaker-to-speaker connections before powering up your system. Full Range Input and Output Jacks All WorkingMan�s Series speaker enclosures feature two, 1/4" full range input/output jacks wired in parallel (Note: The WorkingMan�s Tower features two additional Speakon® Jacks, see page 4). If you are running two speaker enclosures in parallel, connect the speaker cable from your amplifier to the jack labeled �IN,� and a second speaker cable from the jack labeled �OUT� to the input of the second speaker enclosure. Tweeter Attenuator Switch (all models except WorkingMan�s Tower�for that, see page 9) The switch found in the upper right area of the cabinet�s input panel is the Tweeter Attenuator Switch. It is a three-position switch used to adjust the level of high-frequency signal present at the tweeter. The normal (on) setting for this control is �FULL.� Setting the switch to the center position ��6dB� attenuates (lessens) the signal present at the tweeter by 6 decibels (or one half). Setting the switch to the (right) �OFF� position defeats the tweeter (removes the tweeter from the circuit). Note: Any amplifier clipping that occurs will be accentuated by the tweeter. If you hear a distorted signal through your tweeter and fear that it has been damaged, turn down the master volume of your amplifier to see if the distortion remains present. Another common �false alarm� that can be misinterpreted as a horn defect can occur when a string on your instrument is struck with enough force to hit the pickup. This can cause a loud clacking sound which is, once again, emphasized by the high frequency circuit. Speaker Cable Only SPEAKER CABLE of 18 gauge or heavier (the heavier the cable, the lower the gauge) should be used to connect your amplifier to your WorkingMan�s speaker enclosure. Do not use shielded instrument cable to connect your amplifier to your speakers, as this can result in intermittent power loss, cause your amp to oscillate and damage itself and/or your speakers, and render the cable useless for any purpose. Shock Mounted Steel Grill The custom-manufactured steel grill is mounted on the top and sides with hard rubber standoffs and is installed to protect your SWR speaker enclosure�s components from puncture or other physical damage. The standoffs act as �shock absorbers� when the grill is bumped, and are also intended to prevent the grill from rattling during use. Prior to shipping, the grill mounting screws are tightened to a point where the standoff barely compresses. This keeps the height of the grill far enough off the speaker and prevents the grill from rattling on the head of the screw. Should the screws loosen, some rattling may occur. If this happens, simply tighten the screws until they become snug. Do not over-tighten the screws, as this could bring the grill too close to your speaker(s) and cause interference with the speaker cone. Cleaning and Maintenance A soft, dry cloth can be used to remove smudges or fingerprints from the speaker grill. A stiff brush (such as those available in the cleaning section of most supermarkets) can be used to keep the cabinet�s carpeting free of lint, pet hair and dust. Should you encounter a problem with the carpet collecting odor (from smokey clubs, etc.) a common carpet cleaner can be used. It is recommended that, prior to spraying down the entire covering, you test whichever cleaner you choose on a small, inconspicuous area on the underside of the enclosure. This will prevent any accidental discoloration from being in view. All screws on the baffle and input panel should be checked periodically for tightness, so as not to become loose (causing rattles or air leaks) or lost.
3
|
|
|
> |
|