|
|
|
Kategorie
|
|
Informacje
|
|
Polecamy
|
|
|
 |
|
|
Dla tego produktu nie napisano jeszcze recenzji!
 ;
Dokładna dokumentacja, pomogła w szybkiej naprawie telewizora. Dziękuję!
 ;
jedyne do czego mogę mieć zastrzeżenie to jakość zdjęć zawartych w przesłanej instrukcji serwisowej ponieważ są fatalnej jakości, praktycznie nieczytelne. tak poza tym jestem zadowolony to jest to czego szukałem.
;
Wszystko w porządku.
Instrukcja czytelna i kompletna.
Dziękuję.
all right!
thank you.
;
Bardzo dobra instrukcja. Zawiera wszystko co potrzeba, polecam!
;
Instrukcja jest OK. Schematy czytelne, opisane niektóre procedury.
WM-EX921 SECTION 2 GENERAL
A Preparations
Rechargeable Battery A
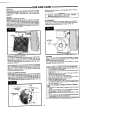
1 Insert the supplied rechargeable battery NH-14WM (A) into the rechargeable battery compartment with correct polarity. 2 Connect the supplied AC power adaptor to the charging stand, plug in the AC power adaptor to the house current (mains). 3 Place the main unit on the charging stand. The CHARGE lamp will light up. About 30 minutes of charging will charge the battery to last about 3 hours. Full charging takes about 6 hours. The CHARGE lamp will go off when charging is complete. You can charge the battery about 300 times. Note
� Do not use the unit while charging. Remove the unit from the charging stand when using it. � If you operate the unit while charging, the battery will not be charged. � If you operate the unit while charging, it may cause malfunction. � Do not place the unit on the charging stand without the rechargeable battery. Otherwise, it may cause malfunction.
This section is extracted from instruction manual.
Other Tape Operations
To play the next track/succeeding 9 tracks from the beginning (AMS*)
On the remote control: Press FF once/repeatedly during playback. On the main unit: Move the jog lever toward .FF once/repeatedly during playback.
To play the current track/previous 8 tracks from the beginning (AMS*)
On the remote control: Press REW once/repeatedly during playback. On the main unit: Move the jog lever toward >REW once/repeatedly during playback.
* Automatic Music Sensor
Repeating the current track (repeat single track function)
On the remote control: Press Y�x twice during playback (�REP� lights up). On the main unit: Press the jog lever twice during playback.
To stop a single repeat
Press Y�x or the jog lever once.
CHARGE
Fast forward/rewind while listening to the sound (CUE/REVIEW)
On the remote control: Press and hold FF/REW during playback and release it at the point you want. On the main unit: Move and hold the jog lever toward .FF/>REW during playback and release it at the point you want.
When to charge the battery B
B
Charge the battery when �e� flashes in the display.
Note � After the battery is replaced, the setting of the SOUND and MODE buttons will be erased.
Using Other Functions
Adjusting Playback Mode D You can adjust the playback direction mode (s or d) as well as the BL SKIP mode (on or off).
1 Press MODE repeatedly. With each press the indications change as follows:
B
Playing a Tape C
1 Insert a cassette and if the HOLD function of the remote control is on, slide the HOLD switch in the opposite direction of the arrow to unlock the controls. 2 Press Y(play)�x(stop) on the remote control* and adjust the volume with VOL.
C
REV FWD
Notes on volume control � The VOL switch on the main unit** has three steps. Generally, set it to the center and make fine volume adjustments on the remote control. Set it to the maximum when the recording level is low. If set to AVLS (minimum), AVLS is activated (see �Protecting Your Hearing �AVLS�). � The sound cannot be turned down all the way. * The Y�x button on the remote control has a tactile dot. ** There is a tactile dot beside the VOL switch on the main unit to show the direction to turn up the volume. Note on the cassette holder When opening the cassette holder, make sure the tape is stopped, then slide the OPEN switch. If the cassette holder is opened when the tape is running, the tape may loosen and be damaged.
s v s BL SKIP v d v d BL SKIP
Plug in firmly. Branchez fermement. Fest einstecken. Jog lever Levier Jog Jog-Hebel HOLD REW (�) FF (+)
�When �BL SKIP� is displayed, the tape is fastforwarded to the next track if there is a blank space of longer than 12 seconds. You will hear repeated sets of three short beeps when skipping a blank. �When �s� is displayed, both sides of the tape is played repeatedly. �When �d� is displayed, both sides of the tape is played once (if you start from R (REV) side, only REV side will be played).
Note � You cannot adjust the playback mode during fastforward or rewind.
To Switch playback to the other side Stop playback
Y�x
Press Y�x for more than a second during playback Y�x once during playback FF during stop REW during stop
Playing a Tape Recorded with the Dolby* B NR System D
Hold down SOUND until �;� appears in the display. To cancel Dolby B NR, hold down SOUND again until �;� disappears.
Note � You cannot turn on/off the Dolby B NR function during fast-forward or rewind.
Fast forward* Rewind*
Hold shutter Cache de verrouillage Schutzschieber Jog lever Levier Jog Jog-Hebel REW
Play the other side from FF for 2 seconds or more the beginning (Skip during stop Reverse function)
FF
D 1 Press SOUND repeatedly. With each press, the indications change as follows: RV (Sound Revitalizer): emphasizes treble sound MB (Mega Bass): emphasizes bass sound (moderate effect) GRV (Groove): emphasizes bass sound (strong effect) none: normal (no effect)
Notes � If the sound is distorted with the mode �GRV�, turn down the volume of the main unit or select other modes. � You cannot change the mode during fast-forward or rewind.
Emphasizing Sound
Play the same side from the beginning (Rewind Auto Play function)
REW for 2 seconds or more during stop
* If Y�x on the remote control is pressed during fast forward or rewind, the Walkman switches to playback.
Operation on the main unit
D
You can operate the tape with the jog lever on the main unit. If the jog lever is hidden (i.e., on hold), slide hold shutter in the direction of �V� to release hold. To Play back
HOLD
Jog lever Press once. Press for more than a second during playback. Press once. Move toward .FF once during stop.
Switch playback to the other side
SOUND
Protecting Your Hearing � AVLS (Automatic Volume Limiter System)
D 1 Set the VOL switch on the main unit to AVLS.
Stop playback Fast forward*
MODE
Hold shutter Cache de verrouillage Schutzschieber
Move toward >REW once during stop. Play the other side from Move and hold toward the beginning (Skip Reverse function) Play the same side from the beginning (Rewind Auto Play function) .FF for 2 seconds or more during stop. Move and hold toward >REW for 2 seconds or more during stop.
Rewind*
To cancel the AVLS function
Set the VOL switch of the main unit to the center or maximum.
Locking the Controls � HOLD Function D
On the remote control, slide the HOLD switch in the direction of the arrow to lock the controls. On the main unit, close the hold shutter so that the jog lever becomes hidden.
* If the jog lever on the main unit is pressed during fast forward or rewind, the Walkman switches to playback.
5
|
|
|
> |
|